
Making Apple Pie from scratch has always been on my baking “to-do list” and as I’m posting this so close to Valentine’s Day, I thought it would made sense to make the pie V-Day themed. However, this recipe can be made at anytime of year, so if you wanna get in touch with your inner baker, give it a shot! I got the idea to use hearts as the pie topping, from American sites that used stars to cover their pies. This pie does take a bit of effort, but it is definitely worth it – I’ve never had an Apple Pie from the supermarket that tasted this good!
I would suggest making this pie in two parts; the pie dough on the first day and then the filling and baking on the second day.
INGREDIENTS
Pie Crust
350g plain flour ¼ tsp salt30g white granulated sugar or caster sugar 225g slightly salted butter, chilled & cut into 1 inch cubes 60ml – 120ml ice water 1 egg and 1TBS milk mixed (for eggwash)
Apple filling
1.1kg apples (e.g Braeburn, Granny Smith, Golden Delicious or Bramley cooking apples) 50g white granulated sugar or caster sugar 55g light brown sugar 1 tsp ground cinnamon 1/4 tsp fresh grated nutmeg (optional) 1/4 tsp salt Juice of 1 lemon 15g cornflourEquipment
9 inch/23cm pie dish Food processor or hand-held pastry blender Rolling pin Measuring jug (for the ice water) Colander/Strainer Baking sheet, covered with parchment or greaseproof paper Pastry brush Heart shaped cookie cutter (optional) *Recipe adapted from Joy of Baking websiteMETHOD
Pie Crust
I am giving instructions based on using a food processor, but I appreciate that not everybody owns one, so you can instead just follow the same method using a large bowl and a hand-held pastry blender (available at most supermarkets).
The key to a good pie crust is not to overmix the dough and to have everything realllllly cold, so cold water and cold butter. I put my butter cubes in the freezer for 10mins before adding it to the pie dough mixture. Also, fill your measuring jug with 120ml of water, add a few ice cubes (to keep the water very cold) and set aside.
Combine the flour, salt and sugar in a food processor until well incorporated.
Add the butter cubes and pulse until you have a course crumble like mixture – the butter should be no smaller than the size of large garden peas (Image 1). Turn the food processor back on and slowly pour 60ml (half) of the ice water into the dough mixture until it holds together when pinched between your fingers. You will need to keep checking and adding more water as necessary (Image 2).
 |
 |
| Image 1 | Image 2 |
Pour the dough out onto your work surface and gather into a ball. Divide the dough in half, you can just estimate it or if you’re a bit OCD like me the you can weigh them to make sure they’re the same size. Flatten these into discs with your hands, wrap them in cling film (Image 3) and refrigerate, preferably overnight (at the very minimum 1 -2 hours).
 |
| Image 3 |
Remove one disc of dough from the fridge, lightly dust your work surface with flour and roll out into a 12 inch/30 cm circle, lifting and turning the dough as your roll to stop it sticking to the work surface (Image 4). Transfer to your pie dish by loosely rolling it over your rolling pin (Image 5). Gently press dough down into the grooves of the pie dish and cut off any overhang with a sharp knife (Image 6). Cover with cling film and put back in the fridge to chill.
 |
 |
| Image 4 | Image 5 |
 |
| Image 6 |
Take out the other disc of dough and repeat the same rolling out process, cut out hearts with your cookie cutter and place them on your parchment covered baking tray. If you don’t want to do the hearts, you can just roll the dough into another12 inch/30 cm circle instead. Place the baking tray in the fridge to chill the dough.
Apple Filling
Pour lemon juice into a large bowl. Peel, core and slice the apples to 1/4 inch thickness (Image 7), put them in the bowl and toss them in the lemon juice, this will stop the apples from turning brown. Mix in the sugar, cinnamon, nutmeg and salt – leave to sit at room temperature for 30mins to 3 hours (Image 8). Then, pour the apples and the juices into a colander and allow to drain for 20mins – yeah I know, lots of draining!!!!!
 |
 |
| Image 7 | Image 8 |
 |
|
| Image 9 |
Remove the pie dish from the fridge, mix the drained apples with the cornflour so they are evenly coated and then pour into the pie dish (Image 10). Dampen the edges of the pie dish with water, remove the hearts from the fridge and arrange on top of the pie filling. (If you are not using hearts then put the second sheet of dough over the apples, tuck the excess dough under the edges, crimp the edges with a fork or your finger and using a sharp knife make 5 slits around the centre of the pie to allow steam to escape). Cover with cling film and put back in the fridge.
 |
 |
| Image 10 | Image 11 |
Preheat your oven to Gas Mark 7/220 degrees C, place your oven rack on the lowest part of the middle shelf (hope that made sense) and put a baking tray/foil on the rack below to catch any juices (cleaning pie juice off the bottom of your oven is not fun, trust me!). Take the pie out of the fridge and brush the top with eggwash. Put the pie in the oven and bake for 40 – 55 mins – the juices should start to bubble, the apples should be tender (not mushy) when poked with a knife. If the edges of the pie start to get too brown, wrap a ring of foil around the edges.
Once the pie is cooked, take it out of the oven and let it cool down for about 3 to 4 hours before you cut it – if you cut it any sooner, the pie won’t hold it’s shape and all the juices will spill out everywhere.
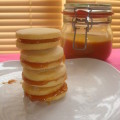
I made a toffee sauce and whipped up some double cream to go with mine, but you can have yours with vanilla ice cream or custard – Apple Pie goes with everything! As you can see this pie does take alot of effort, but don’t be put of as the end result is soooo worth it. Would love to hear how it goes if you try it out. Enjoy x


Looks beautiful! Might try it this week.
Thanks! Would love to know how you get on!
This is the CUTEST pie crust I’ve EVER seen! I wish I had seen it before Valentine’s day.
Thank you! Awww well you can always bookmark it for next year! Or an anniversary maybe? 🙂